that will help You install Your own Laminate Flooring
Detailed Instructions For Laminate Flooring Installation For The Do It Yourself
Laminate flooring installation is not always that easy. I have laid a lot of laminate flooring and even today some jobs take some extra time in planning.
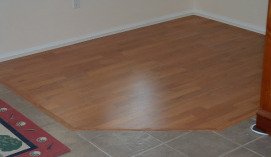
Laminate flooring installed the proper way can be very pleasing to look at. For my readers who choose to take on the task, I think they should have all the information he/she can find.
On this website I want my readers to be aware of the many potential problems you may encounter with laminate flooring installation, and how to correct them so your floor will look like a professional installer did it.
There are quite a few topics that I cover here. Such as calculating how much product you need, preparation, transitions, cutting door jambs, where to start, starting first row, corners, angles, quarter round, last row and other useful topics also.
Questions you may be asking yourself
(Step by step links at the bottom of this page)
JUST ONE POTENTIAL PROBLEM
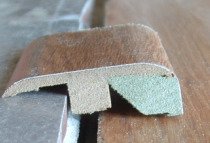
This is just one example of a hidden problem that you may not see until you have removed the old carpet. The laminate floor being a different height from the tile floor it is transitioning to.

In this photo is a small piece of the transition molding, it would be incorrect to install it in this manner to cover this space.
What you want is for the mold to set level here and this will eliminate you having to redo it in the future.
I see this a lot on jobs I do.

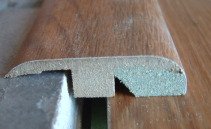
In this next photo I have modified the molding to fit correctly. This mold will be glued to the tile and the laminate flooring. I use a strong construction adhesive on the tile and a laminate sealant on the laminate.
I'll show you how to
install transitions on uneven surfaces.

There are many things like this if not done properly can take away from the overall look of your floor. I want my readers to be able to install your floors so you achieve the very best results possible.
LETS INSTALL YOUR LAMINATE FLOORING
Laminate flooring installation from beginning to end
The Best Way To Calculate Area Needed
Transition molds which type and how much
Measuring Baseboard and 1/4 round
Preparation, not so much fun
Installing Laminate at Sliding Glass Doors, Preparation
Under Cutting Door Jambs
Installing Laminate Cutting Angles
Starting the Laminate Installation
Cutting Laminate Around Corners
Installing the first row of laminate flooring
Installing the Last Row Of Laminate