that will help You install Your own Laminate Flooring
Installing New Baseboard
Installing new baseboard involves getting the exact measurement and the correct angle to be cut.
Base board is heavier than quarter round, so when cutting it on a miter saw you will either need someone to hold up the end if it is a long piece or get stands that do it for you.
As with quarter round there are two basic cuts, inside corner cuts and outside corner cuts. Most corners are 90 degrees (that is just like the corner of a square). Other times you may run across angels that are less or more than 90 degrees.
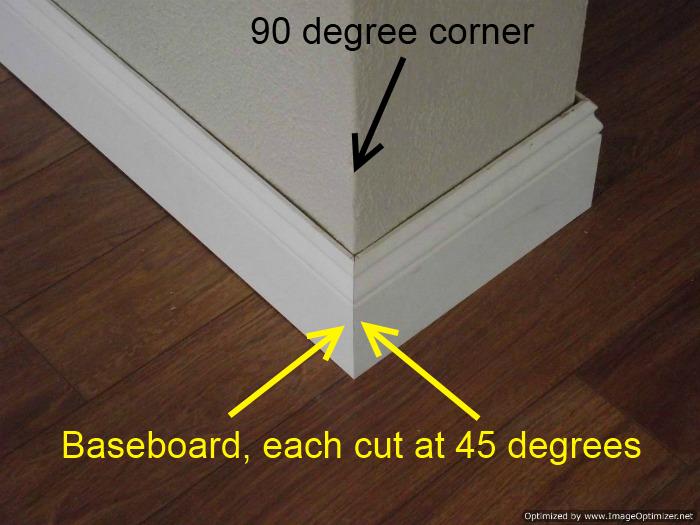
When cutting any two pieces of baseboard, to get the best fit each cut needs to be cut at the same angle. So when cutting baseboard for a 90 degree corner each cut will be 45 degrees.
The sum of both cuts will add up to the total angle of the corner.
CLICK ON PHOTOS TO GET A CLOSER LOOK
In this photo to the left you can see a typical 90 degree corner. The baseboard is cut at 45 degrees each for the tightest fit.
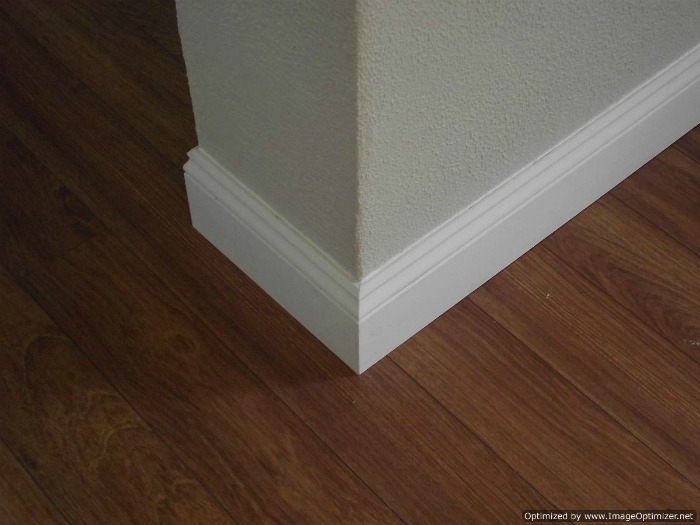
You may also notice the gaps at the top and the bottom of the baseboard. After nailing the base board the gaps at the top will be less, and will be filled in with chalking.
This is the finished baseboard after nailing and chalking it.
The gaps at the bottom are there for two reasons. Either the sub floor is not flat or the baseboard itself is not straight.
Most of the time the gaps can be eliminated when you are nailing the baseboard up. When nailing the baseboard use a piece of wood or a tapping block to push the baseboard down flat on the floor before nailing.
If the sub floor is too uneven for this to work, you may need to scribe the baseboard to fit the contour of the floor. I explain how to scribe a stair riser which is basically the same as scribing baseboard.
The only other way to eliminate this problem is to prep the sub floor in advance and make it flat. This can be a job in itself.
When installing new baseboard you will most likly use a miter saw. I will describe how I cut baseboard on a miter saw.
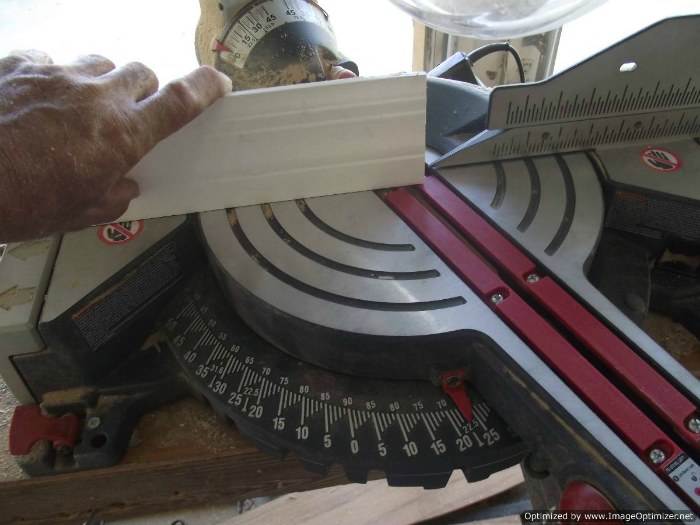
Depending on how tall the baseboard is, will determine how to cut it. The two methods I use are: 1. Stand the baseboard up like when it is installed on the wall. 2. Lay the baseboard flat on the saw to cut.
When cutting baseboard on a miter saw there is only so much room under the blade. Most miter saws will allow you to cut a 3 inch baseboard standing up vertical, this happens to be the easier way to cut baseboard. But if you try to cut a taller baseboard such as a 5 inch tall baseboard, it will not fit under the blade.
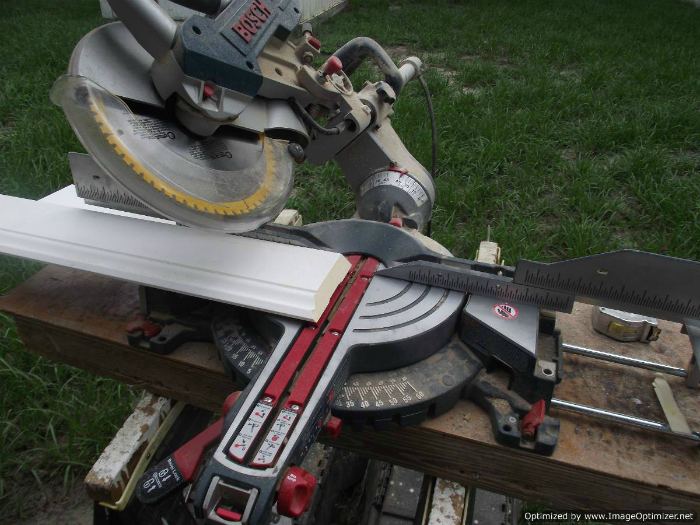
With the taller baseboard you will have to lay it flat in order to cut it. To do this your miter saw will need to cut on a bevel. This means the saw blade will have to tilt. Not all miter saws are made to cut on a bevel. Cutting baseboard on a bevel is a little more difficult then cutting baseboard that is vertical.
In this photo to the left you can see where the blade is tilted. In order to cut the 45 dgree angle on this baseboard the blade needs to be tilted 45 dgrees.
To get the best results when cutting baseboard use a new sharp blade. Especially when cutting on a bevel.
When installing new baseboard and cutting on a bevel, it is always more dangerous than cutting with the blade vertical. You should always check and double check your hands to make sure they are safe.
Return to Installing Baseboard Page From Installing New Baseboard Page
How to Cut Baseboard
SEARCH THIS SITE


