Sunken Living Room Laminate Installation
A sunken living room laminate installation is basically installing laminate flooring up to the step down. If your installing the laminate above you will treat it as a stair.
You will need stair nose to cover the top of the step down.
If your installing your laminate flooring over a wood sub floor it will be a little simpler then installing the flooring on a concrete sub floor with a sunken living. When you are installing over a wood sub floor, you will treat it as installing laminate on stairs. I will describe what need to be done if the concrete step down is not suitable for attaching the new laminate flooring to.
Usually when the concrete is poured the finishers are not too concerned about how smooth the step down is or how plumb it is. When I encountered a step down with a concrete sub floor, I had to glue and screw a 1 X 10 board on the face of the step down to make a good surface to attach my riser to. This particular step down was about 18 feet long.
When I installed the 1 X 10 board I had to cut the top flush with the floor above, as this is where the stair nose molding will rest.
I used Tapcons and construction adhesive to attach the board to the concrete.
When the board is attached, install the flooring above up to the edge like installing laminate on a stair.
On the floor below you can install the laminate up to the step down and either use 1/4 round to fill where it meets, or install the riser (the face of the step down) on top of the flooring.
Sunken Living Room Laminate Installation, How to do This
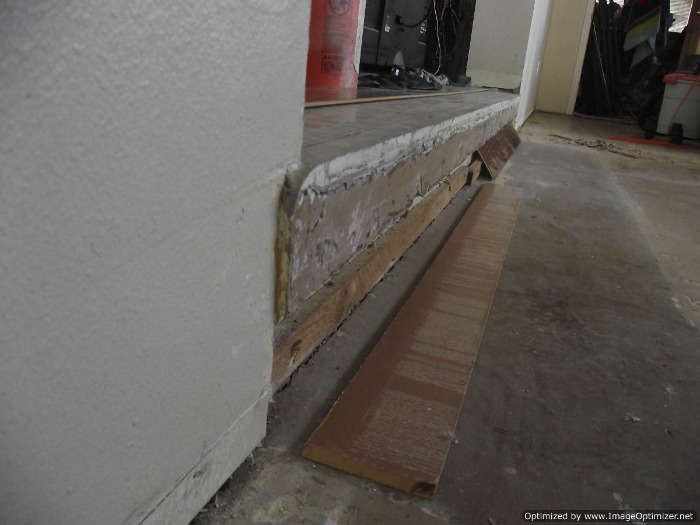
This is a typical step down from one room to another. This one happens to be concrete. In this case the concrete protrudes out into the room just a little.
CLICK ON PHOTOS TO ENLARGE
The top of the step needs to be as level as possible so the stair nose will sit level. You may have to either smooth it out with some floor patch or grind it down if it has high spots.
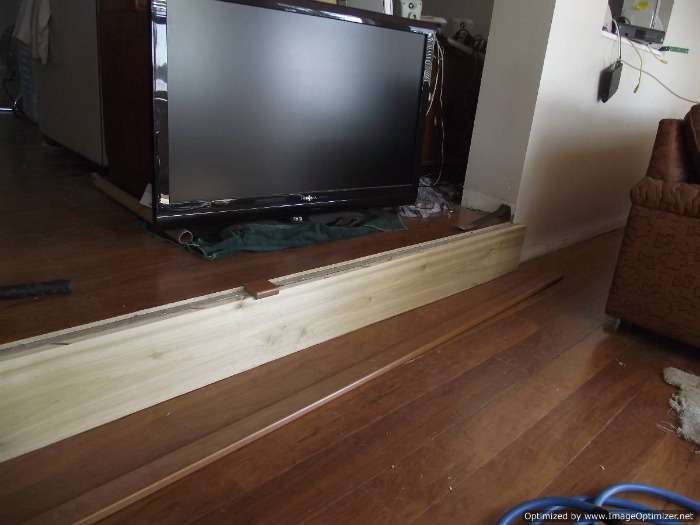
On this job my client wanted to use the laminate flooring as a riser at first. As you can see in this photo the riser does not go down to the floor. My client wanted to run the base board along the wall and along the bottom of the step.
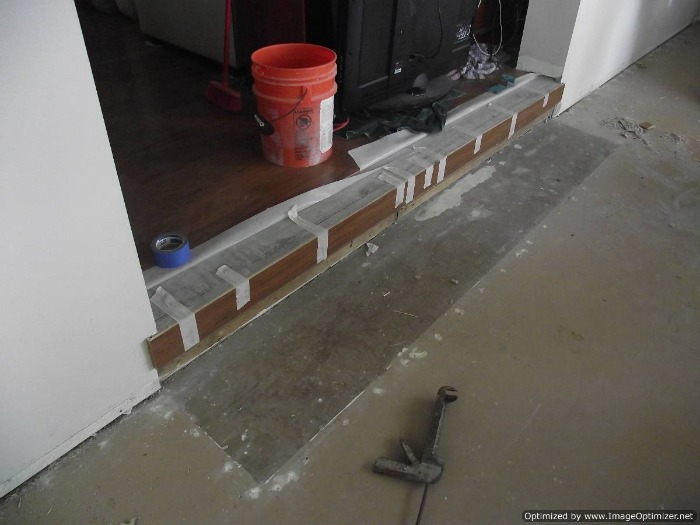
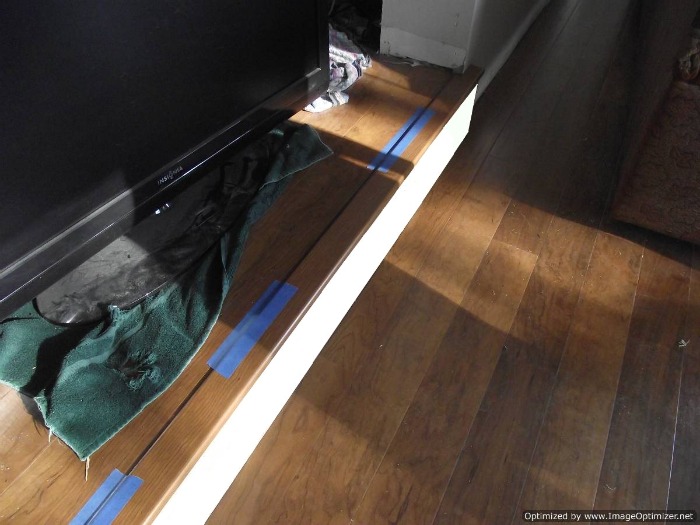
I glued the laminate riser to the concrete with construction adhesive and taped it in place to dry. I had to make sure the top edge of the riser is flush with the floor above so the stair nose will sit level.
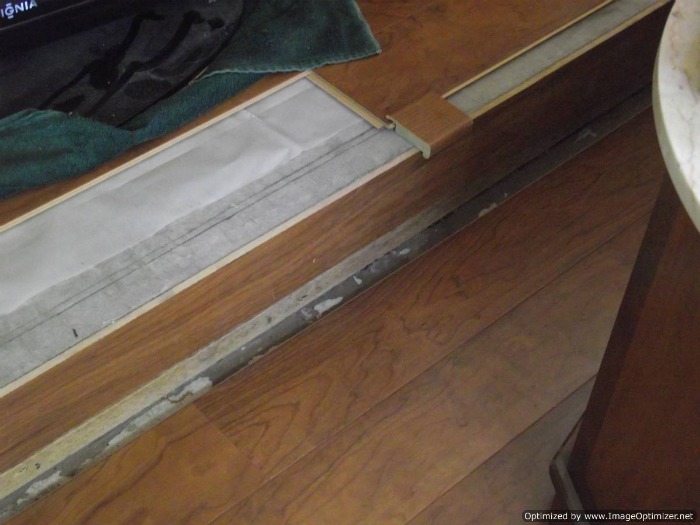
With the riser in place I can cut the laminate flooring to the right width so the stair nose over laps the riser and the laminate flooring.
In the photo to the left you can see I use a small piece of stair nose as a guide so I can cut the flooring to the correct size.
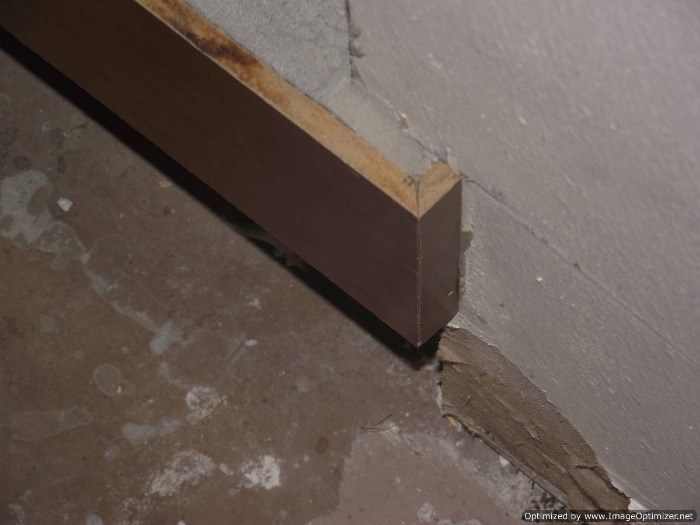
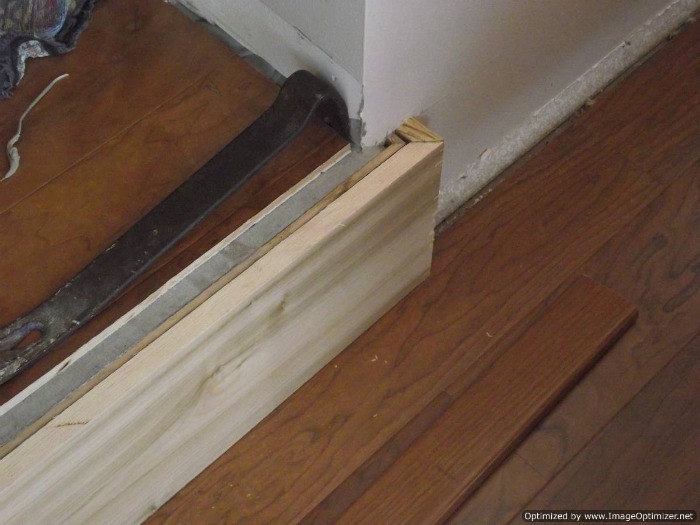
With the step protruding out past the wall, I had to finish the ends with a 45 degree cut and add a small piece. Otherwise it would just be the cut end of the laminate that would show.
After gluing the laminate riser on, my client decided that he wanted a painted riser instead. He purchased a 1 X 10 piece of pine.
First thing to do is to lay the laminate flooring up to the step on the lower level. This needs to be done so the new pine riser will sit on it.
After the floor is installed, the pine riser needs to lay flat on the floor below. In this case the floor was not flat. I laid the pine riser on the floor where it is going to be installed.
Next I had to scribe the pine riser to follow the hump on the floor below. The easiest way to scribe the riser is to lay a pencil flat on the floor with the lead touching the riser. Slide the pencil along the floor marking the riser from end to end.
The best way to cut this is with a table saw. Using a sharp blade cut nice and easy following the line. Lay the riser in place to see if it fits good. You may have to do it more than once to get it close to the contour of the floor.
Once the bottom of the riser is scribed to fit. The top of the riser needs to be cut so it is flush with the floor above. This is critical so the stair nose sits level on the top of the riser.
When the top of the riser is cut, glue the riser in place with some construction adhesive.
Its best to let the glue set up for a while before installing the stair nose.
To install the stair nose the floor above will need to be installed first. Install the stair nose by using the same construction adhesive. Use a good amount to be sure it is secure.
You can shoot some nails through the stair nose into the riser for extra stability. make sure your aim is good so the nails go into the riser. Cover the nail holes with matching putty.
Return to Installing Laminate Flooring on Stairs Page From Sunken Living Room Laminate Installation Page
Return to FAQ About Laminate Flooring Page From Sunken Living Room Laminate Installation Page
Return to Home Page
| SEARCH THIS SITE
|
