Cutting Stair Nose Molding
STEP - 6
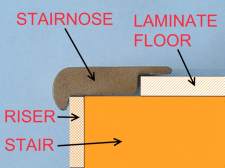
Cutting stair nose molding for laminate or hardwood flooring is about the same for each. The difference between the two are the hardwood stair nose usually has a grove that fits flush with the hardwood flooring, whereas laminate stair nose over laps the laminate flooring on the stairs. In this photo you can see how the laminate stair nose should be positioned in relation to the riser and the laminate.
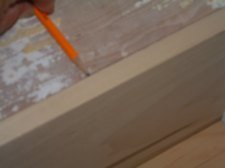
The main objective when cutting stair nose molding and installing it, is to cut the stair nose as tight as possible to fit on each side. And to have it set level on the edge of the stair. This applies to laminate stair nose as well as hardwood stair nose. This is accomplished by cutting the riser flush with the top of the step. As shown in this photo I mark the top of the riser with a pencil from the back.
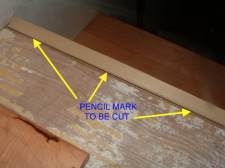
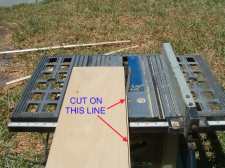
Before I can mark the riser I have to set the riser on some flooring on the tread below. This will be the finished height of the riser. Then I cut it on the table saw. In this photo to the left you can see the pencil mark I'm going to cut.
Now cutting stair nose molding to fit is not too complicated, getting it to sit level takes more time. The riser will dictate how the stair nose sets on the stair. I always cut a sample to use as a guide. I cut a piece off the end of one. Just make sure you don't cut too much off making yourself short on stair nose.
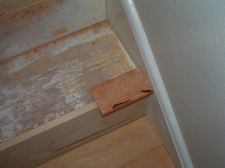
Here in this photo I'm installing hardwood flooring on these stairs. This is the sample of stair nose. I use this sample to determine if it fits square on each side. I hold it tight against the riser and against the stringer. If the sample isn't tight against the stringer I may have to cut the stair nose at a slight angle to achieve a tight fit.
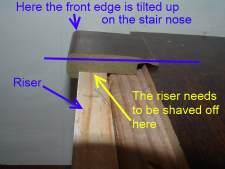
The stair nose molding will be attached covering the top of the riser. The top of the riser will determine if the stair nose molding is level. You want the stair nose to lay level and flat as the tread. If the front of the stair nose is tilted up on the front edge, you will need to cut the riser down a little at that spot. If the stair nose is tilted down you will need to ad some thin strips of wood to build it up so the stair nose is level. If you have to add thin strips of wood you can glue them on with construction adhesive.
The idea is to get it right when you initially cut the top of the riser. But it doesn't always work out that way. So rather then cut a whole new riser you can make small adjustments.
STEP - 7 Installing Laminate Tread
Return to Installing Laminate Flooring On Stairs Page From Cutting Stair Nose Molding Page
Return to Home Page From Cutting Stair Nose Molding Page
| SEARCH THIS SITE |
