Laminate Transitions at Sliding Doors
Installing laminate transitions at sliding doors or any door opening that is lengthy, can vary from one to another. There are different types of frames around sliding glass doors. The bottom part of the frame on the floor is where the transition will meet. This bottom part can make it easy or hard depending on the shape of it.
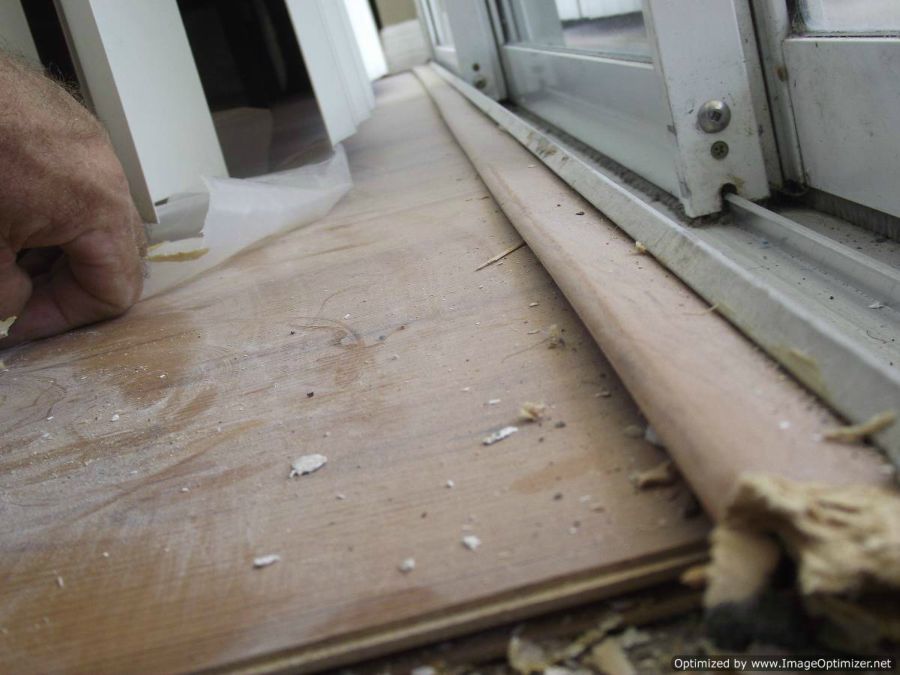
The easiest type to deal with is the frame that has a vertical edge which is shown in this photo. Other types have a sloping edge that slopes down to the floor.
Below I am describing how to install a transition that is not made for the thickness of the laminate being installed. If this laminate was a 7 or 8mm you wouldn't have to modify the transition to fit.
CLICK ON PHOTOS TO ENLARGE
These days there are a lot of laminate
floors that are thicker then in the past when most were 7 or 8mm thick. Now there are products as thick as 15mm. The problem is the transitions are
still made for the thinner laminate floors (such as 8mm) in most cases.
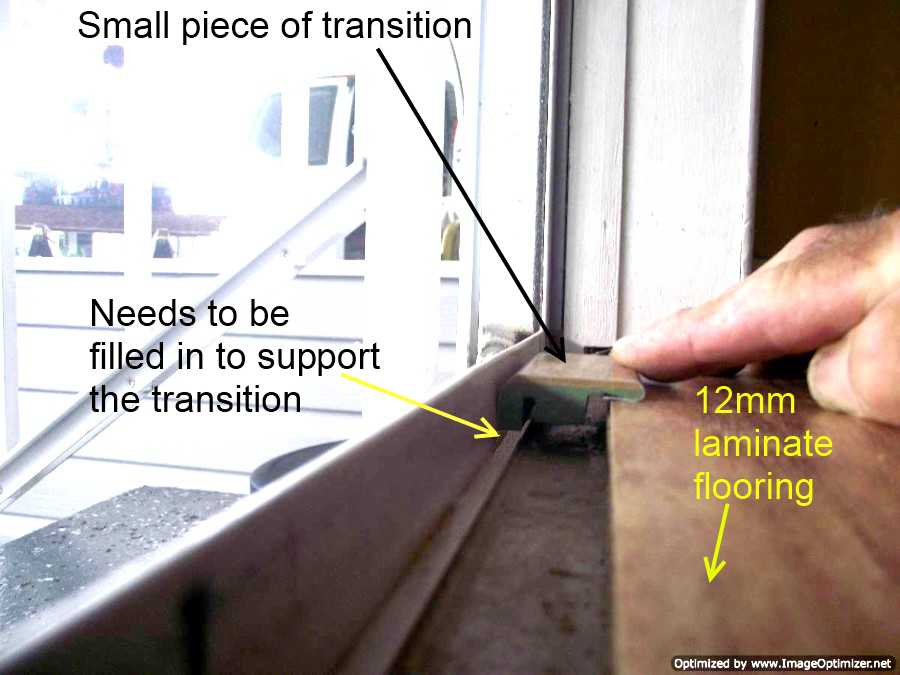
As in this photo I am holding the small piece of transition level up
against the door frame, while installing 12mm laminate flooring. This matching transition was included in the order with the laminate flooring.
You can see the leading edge of the transition does not touch the floor. Underneath the front edge will need to be filled in in order to support the transition.
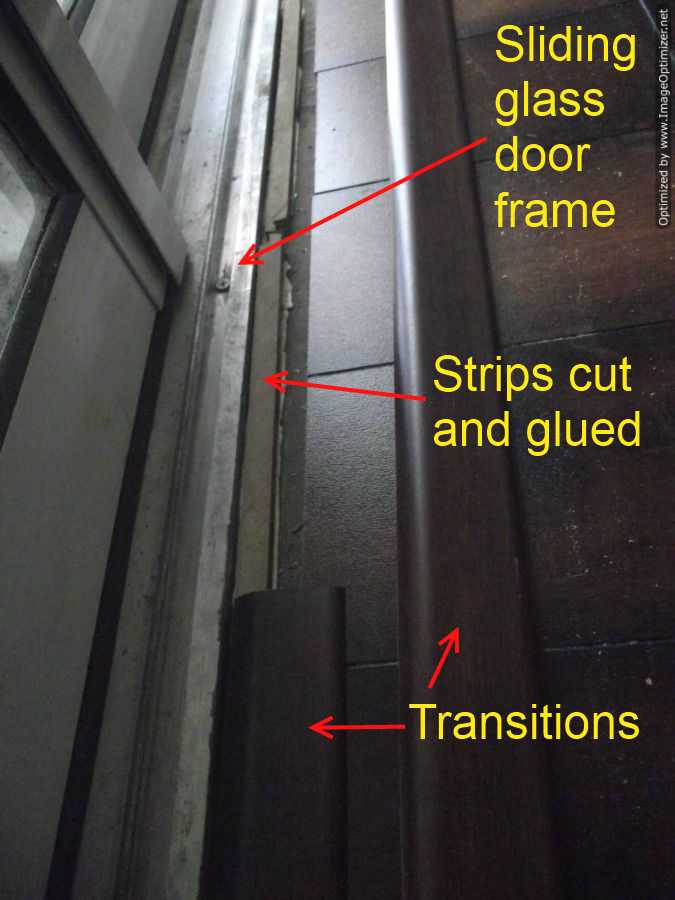
The problem with the sliding door frames (not in all cases) is when the concrete was poured up to the frame, it isn't always level up to the frame. So to keep the transition even along the length of the sliding door frame, adjustments need to be made.
The easiest way to do that is to cut some strips off a piece of the laminate flooring your using. These strips need to be the exact thickness to keep the transition level.
You don't want the leading edge of the transition to be too high or to slope down. Sometimes I may need to cut the strip starting at one end thin, and by the time I reach the other end the strip can be twice as thick.
It can be a little tedious but at least the transition will look level with the frame rather than high on one end and sloped down to the other end.
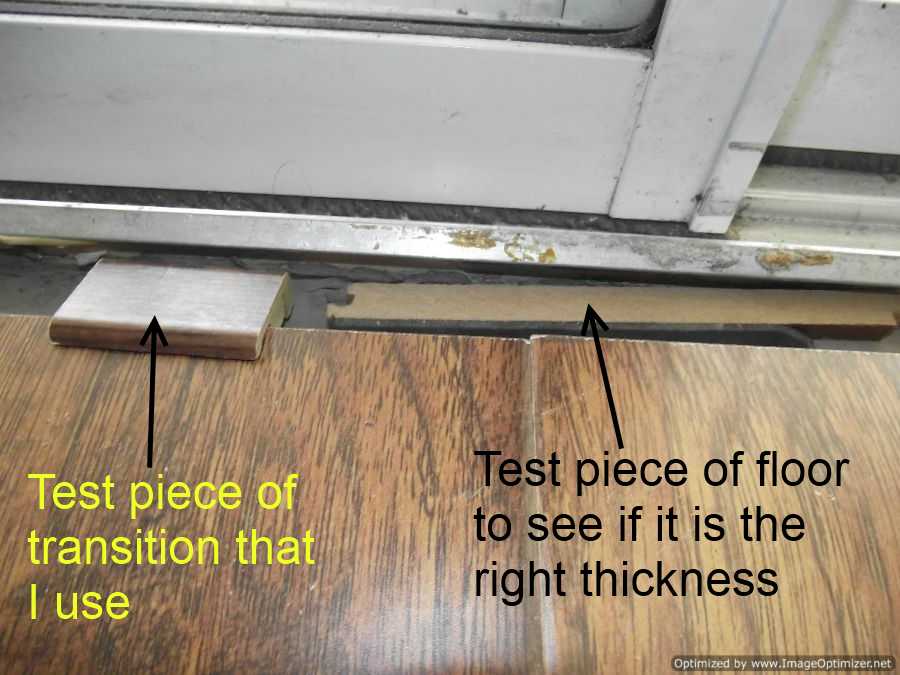
After
cutting the strips I check them with a small piece of transition to
make sure they are not too thick or thin. I do this by laying the
different strips in place in front of the door frame and use my test
piece of transition to see if it sits level. I check along the whole length of the door frame to see where it is high or low.
I use my table saw to cut the strips. The small pieces I'm using are cut off the ends of the laminate flooring. When I find the thickness I need, I cut down the laminate planks the long way and use the long pieces.
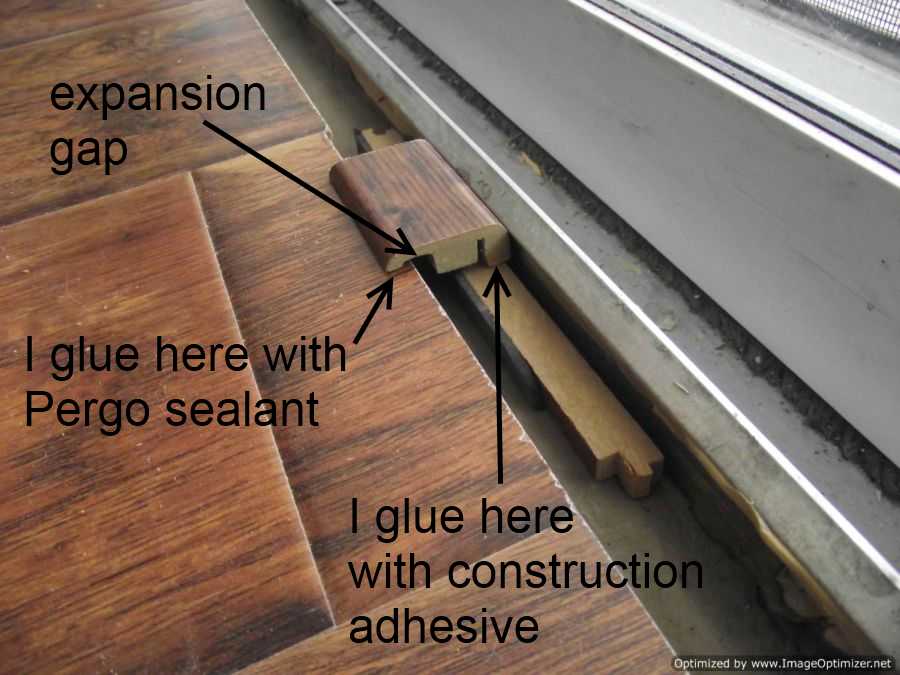
After cutting the long pieces at the correct thickness, I glue them in front of the sliding door frame with construction adhesive. I then cut the transition to the width of the doorway. Sometimes it takes more than one length of transition if the sliders are wide.
To attach the transitions I use construction adhesive on the side that meets the door frame and Pergo sealant on the edge of the laminate flooring. This works good because the sealant is flexible and compensates for floor expansion. Do not use the construction adhesive on the laminate side.
Here is an example of the transition being installed wrong. There was not enough expansion space when the laminate was installed. The laminate expanded and pushed the transition up. I always leave at least 1/4 inch if not more. This was a replacement job I had to do that someone else installed.
Return to Installing Laminate Transitions Page From Laminate Transitions at Sliding Doors Page
| SEARCH THIS SITE |